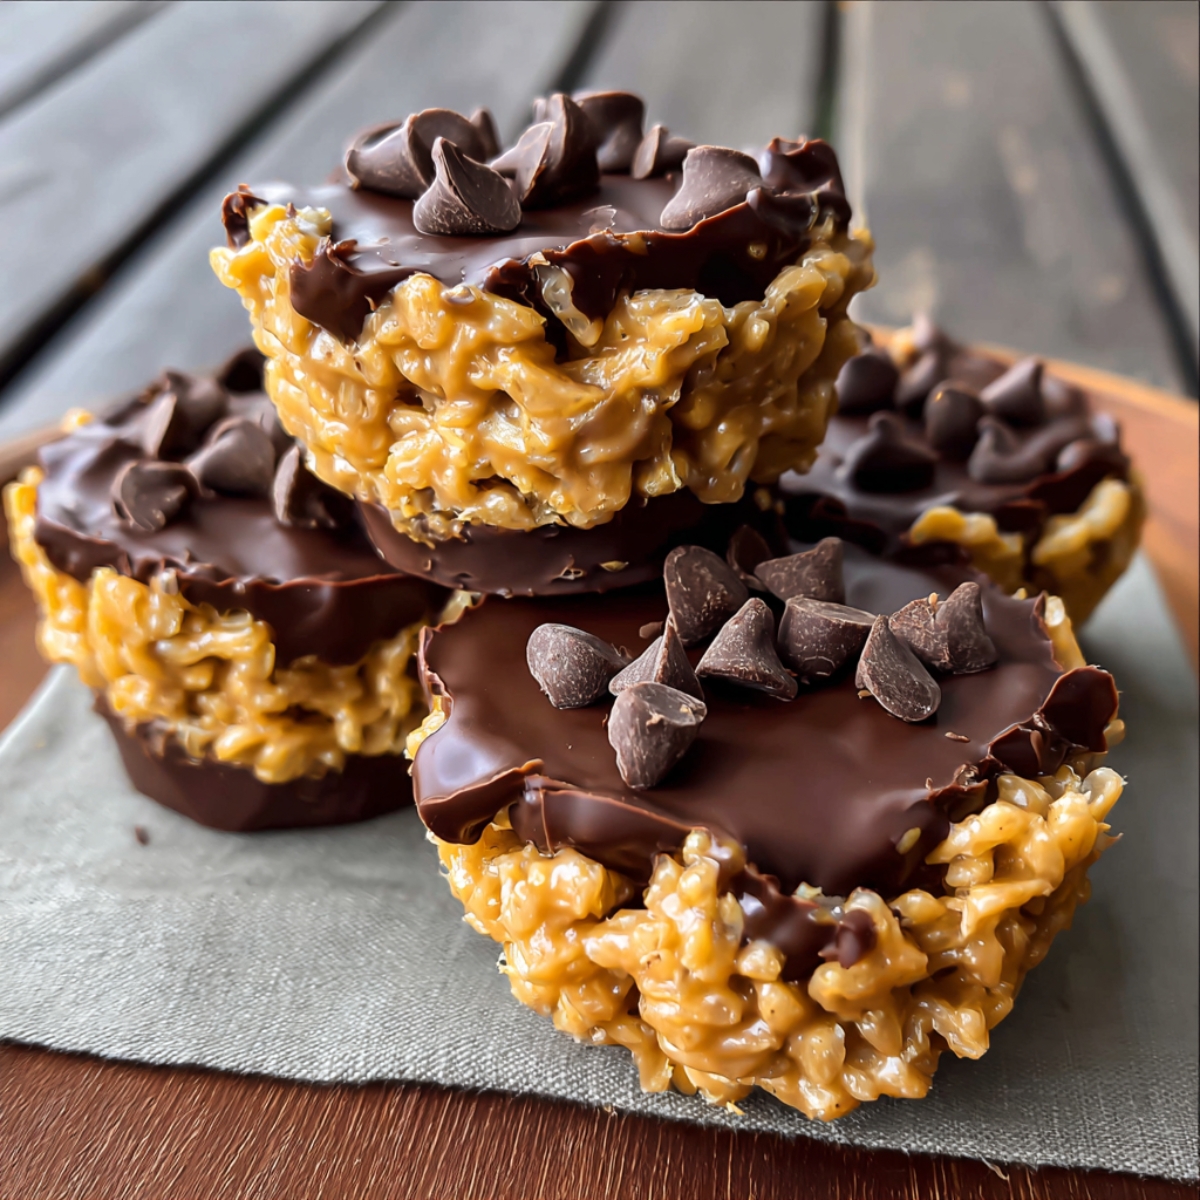
Lucas came home from school about two years ago practically vibrating with excitement about something his friend brought for snack. "Mom, they were like Reese's cups but BIGGER and CRUNCHIER," he kept saying. His friend's mom gave me the basic idea, and I went home and immediately started testing versions in our kitchen. After burning through about three boxes of Rice Krispies and way too much chocolate, I figured out these chocolate peanut butter rice krispie cups that Lucas now requests at least twice a week.? They take maybe 20 minutes to make, and most of that is just waiting for chocolate peanut butter rice krispie cups to melt.
Why You'll Love These Chocolate Peanut Butter Rice Krispie Cups
Back making these probably 80 times over the past two years, I know exactly why they've become my answer to everything. They're ridiculously easy - like, almost too easy to admit. No oven, no mixer, nothing complicated. You melt chocolate, stir stuff together, press it into cups, and throw them in the fridge. Takes about 20 minutes total, and most of that is just waiting. I've made them while Lucas sits at the kitchen table doing homework. I've made them at midnight when he casually mentions his class snack is tomorrow morning.
Here's the real reason these chocolate peanut butter rice krispie cups have stuck around though - they work on literally everyone. Kids see them and think they're getting store-bought candy. Adults try them and start asking questions about the recipe. Teachers appreciate them because it's not another batch of brownies. Lucas's friends now ask for "those peanut butter things" by name when they come over. Even Emma's mom, whose idea this was in the first place, ate one of mine and said it was better than hers (probably just being nice, but whatever).
Jump to:
- Why You'll Love These Chocolate Peanut Butter Rice Krispie Cups
- Ingredients for Chocolate Peanut Butter Rice Krispie Cups
- How To Make Chocolate Peanut Butter Rice Krispie Cups Step By Step
- Smart Substitutions for Chocolate Peanut Butter Rice Krispie Cups
- chocolate peanut butter rice krispie cups FOR Variations
- Equipment for chocolate peanut butter rice krispie cups
- Storing Your Chocolate Peanut Butter Rice Krispie Cups
- Top Tip
- FAQ
- Your New Favorite No-Bake Treat!
- Related
- Pairing
- chocolate peanut butter rice krispie cups
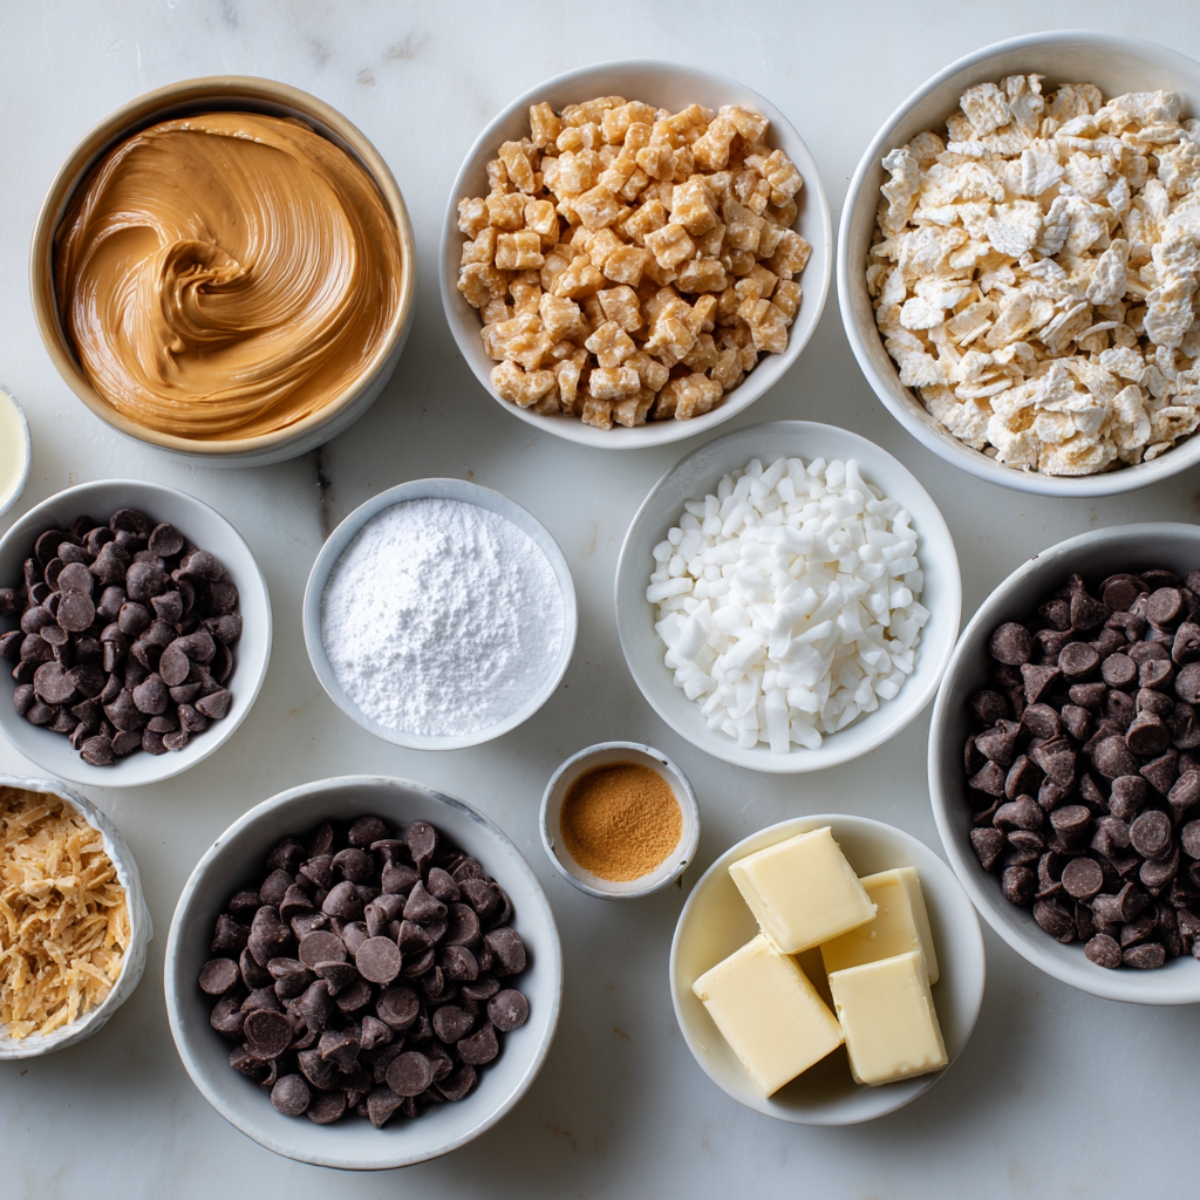
Ingredients for Chocolate Peanut Butter Rice Krispie Cups
The Chocolate Shell:
- Semi-sweet chocolate chips
- Milk chocolate chips
- Coconut oil or butter
The Peanut Butter Filling:
- Creamy peanut butter
- Rice Krispies cereal
- Powdered sugar
- Butter
- Vanilla extract
- Salt
For Assembly:
- Mini cupcake liners
- Mini muffin tin
See recipe card for quantities.
How To Make Chocolate Peanut Butter Rice Krispie Cups Step By Step
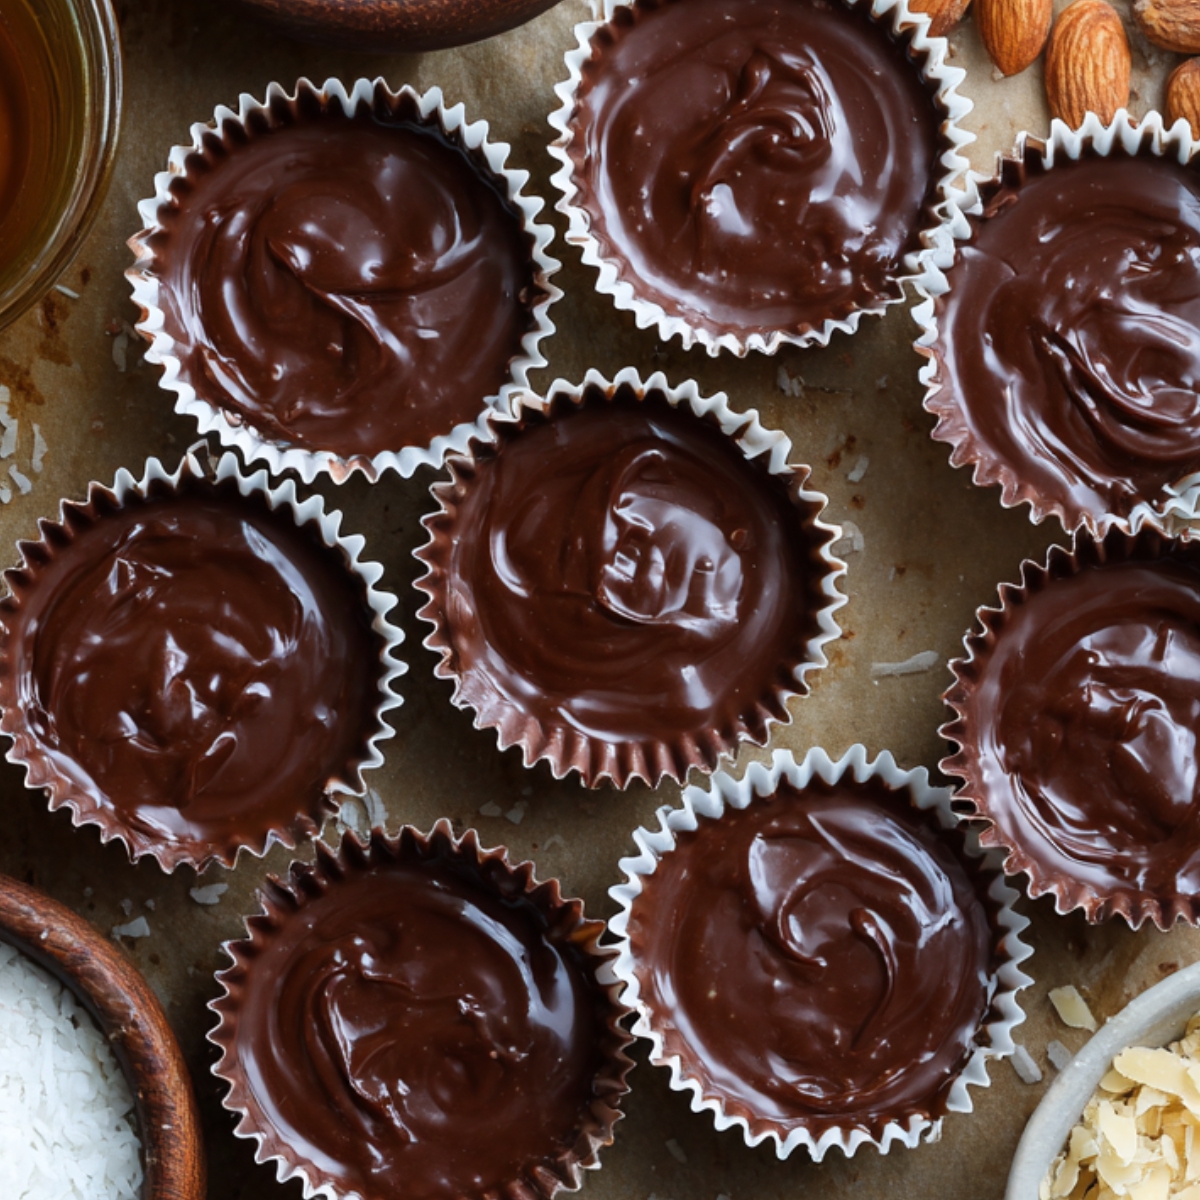
Make the Chocolate Shells
- Melt both chocolates with coconut oil in microwave
- Stir every 30 seconds until completely smooth
- Spoon about 1 tablespoon into each liner
- Use back of spoon to push chocolate up the sides
- Freeze for 10 minutes until firm
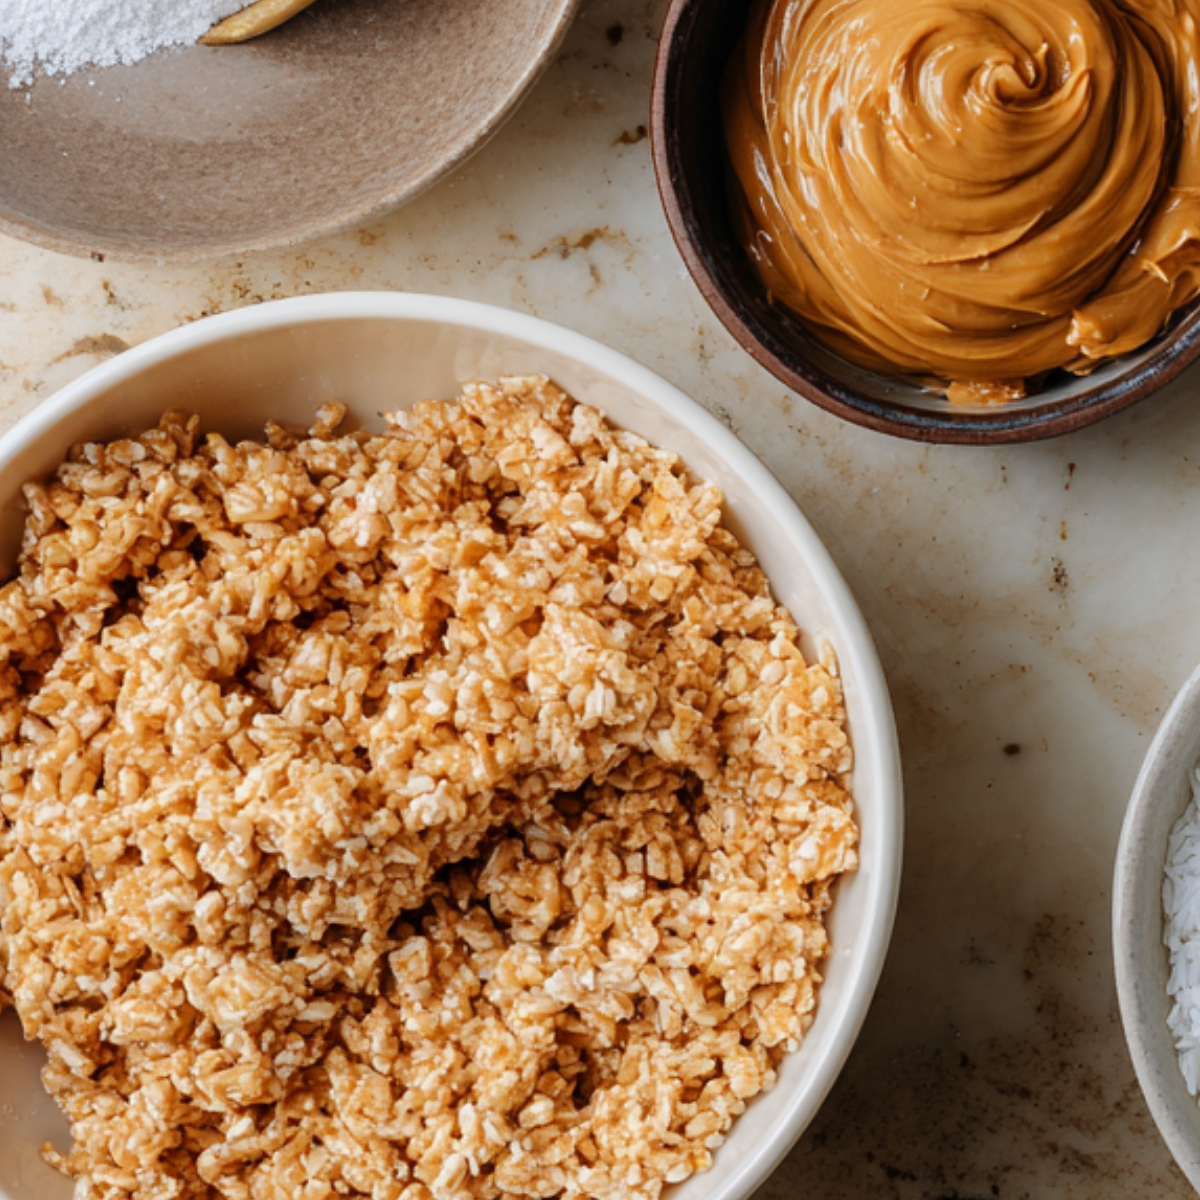
Create the Peanut Butter Filling
- Melt butter in microwave until just melted
- Mix in peanut butter until smooth and combined
- Stir in powdered sugar and vanilla extract
- Fold in Rice Krispies until evenly coated
- Add pinch of salt and mix one more time
Assemble the Cups
- Remove chocolate shells from freezer
- Scoop peanut butter mixture into each cup
- Press down gently but don't pack it tight
- Leave a little space at the top for more chocolate
- Work quickly before the filling gets too warm
Seal and Finish
- Freeze for 15-20 minutes until completely set
- Spoon remaining melted chocolate over each cup
- Spread to cover the filling completely
- Tap the tin gently on counter to smooth tops
- Sprinkle with sea salt flakes if you want
Smart Substitutions for Chocolate Peanut Butter Rice Krispie Cups
After making these for people with all kinds of dietary needs and preferences, here's what actually works:
Chocolate Options:
- Semi-sweet → Dark chocolate
- Milk chocolate → White chocolate
- Regular chips → Sugar-free chocolate chips
- Chocolate chips → Chocolate melting wafers
Peanut Butter Swaps:
- Creamy peanut butter → Crunchy peanut butter
- Regular PB → Almond butter
- Peanut butter → Sunflower seed butter (allergy-friendly)
- Standard → Powdered peanut butter (mix with water first)
Cereal Changes:
- Rice Krispies → Cocoa Krispies
- Regular → Gluten-free Rice Krispies
- Plain → Chocolate rice cereal
- Krispies → Crushed cornflakes
Sweetener Switches:
- Standard → Honey (makes it stickier)
- Powdered sugar → Coconut sugar (blend it fine first)
- Regular → Monk fruit powdered sweetener
- White sugar → Brown sugar (changes color slightly)
chocolate peanut butter rice krispie cups FOR Variations
S'mores Style:
- Use milk chocolate for the shells
- Mix mini marshmallows into the Rice Krispie filling
- Add crushed graham crackers to the peanut butter mixture
- Top with a toasted marshmallow before sealing
- Creates that campfire flavor everyone loves
Cookies and Cream:
- Use white chocolate for the shells instead
- Crush Oreos and fold into the filling
- Skip some Rice Krispies to make room for cookies
- Drizzle with dark chocolate after they're set
- Kids go absolutely nuts for this version
Triple Chocolate:
- Use dark chocolate for the cups
- Mix cocoa powder into the peanut butter filling
- Use Cocoa Krispies instead of regular
- Top with chocolate sprinkles before freezing
- Perfect for serious chocolate lovers
Salted Caramel Crunch:
- Add caramel bits to the peanut butter mixture
- Drizzle caramel sauce on top of chocolate
- Finish with flaky sea salt
- Use honey roasted peanut butter for extra depth
- This one's dangerous because you can't stop at one
Equipment for chocolate peanut butter rice krispie cups
- Mini muffin tin (24-cup works best)
- Mini cupcake liners
- Microwave-safe bowls
- Measuring cups and spoons
- Regular spoon or small cookie scoop
- Rubber spatula
Storing Your Chocolate Peanut Butter Rice Krispie Cups
After making these for two years and learning the hard way what works, here's how to keep them fresh:
Fridge Storage (1-2 weeks):
- Keep them in an airtight container
- Layer them with parchment paper between if you're stacking
- Store in the coldest part of your fridge
- Pull out about 5 minutes before eating for best texture
Freezer Storage (2-3 months):
- Freeze them in a single layer first on a baking sheet
- Once solid, transfer to freezer bags or containers
- Label with the date because you will forget
- Eat straight from frozen or thaw for 10 minutes
Room Temperature (Don't):
- These will melt and get gross
- Chocolate gets soft and the cups lose their shape
- Peanut butter filling gets oily
- Just don't do it unless you're eating them immediately
Travel Tips:
- Learned this at Lucas's outdoor field day in May
- Pack them in a cooler with ice packs for bake sales
- Keep them cold until right before serving
- They'll survive about 30 minutes at room temp before things get messy
Top Tip
- These need to stay cold or they turn into a melted mess. Keep them in an airtight container in the fridge for up to two weeks, with parchment paper between layers if you're stacking them. Pull them out about five minutes before eating so they're not rock hard. For longer storage, freeze them in a single layer on a baking sheet first, then transfer to freezer bags once they're solid..
- Don't leave these at room temperature unless you're eating them right away. The chocolate peanut butter rice krispie cups gets soft, the cups lose their shape, and the peanut butter filling starts getting oily. I learned this the hard way at Lucas's outdoor field day in May when I brought a container and didn't think about the heat. By the time snack came around, I had a container of chocolate soup with Rice Krispies floating in it.
- Here's something weird I discovered - these taste better the day after you make them. Something about sitting in the fridge overnight makes the flavors blend together and the texture gets perfect. The chocolate peanut butter rice krispie cups firms up just right, the peanut butter filling sets but stays creamy, and everything just works better. I always make them the night before I need them now instead of rushing to finish them the same day.
FAQ
How do you make chocolate peanut butter rice crispy cups?
Melt chocolate and press it into mini cupcake liners to form shells, then freeze until firm. Mix peanut butter with melted butter, powdered sugar, and Rice Krispies for the filling. Scoop filling into chocolate cups, top with more melted chocolate peanut butter rice krispie cups to seal, and freeze until set. Takes about 20 minutes total and requires no baking.
How many days in advance can you make chocolate covered Rice Krispie treats?
You can make these chocolate peanut butter rice krispie cups up to two weeks ahead if you store them in the fridge, or up to three months if you freeze them. They actually taste better after sitting overnight because the flavors blend together. Just keep them in an airtight container with parchment between layers.
What are some common mistakes when making Rice Krispie treats?
The biggest mistake is using too much heat when melting marshmallows or chocolate peanut butter rice krispie cups - it makes everything tough and hard. Other common problems include not letting the chocolate shells set before adding filling, overpacking the Rice Krispie mixture which makes them dense, and leaving them at room temperature where the chocolate melts and gets messy.
Why do bodybuilders eat rice krispies cereal?
Rice Krispies are a quick source of simple carbs that digest fast, making them popular for post-workout meals when bodybuilders need to replenish energy quickly. They're low in fat and fiber, which means they won't slow down digestion. That said, these chocolate peanut butter rice krispie cups are definitely a treat, not a bodybuilding snack.
Your New Favorite No-Bake Treat!
Now you've got everything you need to make these chocolate peanut butter rice krispie cups that'll trick people into thinking you're some kind of kitchen wizard. From the chocolate peanut butter rice krispie cups shells to the peanut butter filling, you know exactly what to do. Make them once and you'll understand why Lucas requests them twice a week and why Emma's mom still asks me to bring them to soccer practice.
Want more stuff that's easy but looks like you tried hard? Check out our Easy Red Velvet Oreo Cheesecake Delight that takes maybe 15 minutes and looks fancy as hell. Got brown bananas on your counter? Our Delicious Banana Walnut Cake is what you do with those instead of throwing them out. And if you want cookies without the whole rolling-and-chilling thing, the Easy Chocolate Crinkle Cookies Recipe makes those bakery ones with the crackly tops that people pay too much money for.
. We actually look at those posts.
Rate this and tell us if they worked out!
Related
Looking for other recipes like this? Try these:
Pairing
These are my favorite dishes to serve with chocolate peanut butter rice krispie cups

chocolate peanut butter rice krispie cups
Ingredients
Equipment
Method
- Melt both types of chocolate with coconut oil in a microwave-safe bowl. Stir every 30 seconds until smooth.
- Spoon about 1 tablespoon of melted chocolate into each cupcake liner. Use the back of the spoon to coat the sides.
- Freeze for 10 minutes until firm.
- Melt butter in the microwave, then mix in peanut butter until smooth.
- Stir in powdered sugar, vanilla, and salt until fully combined.

Leave a Reply