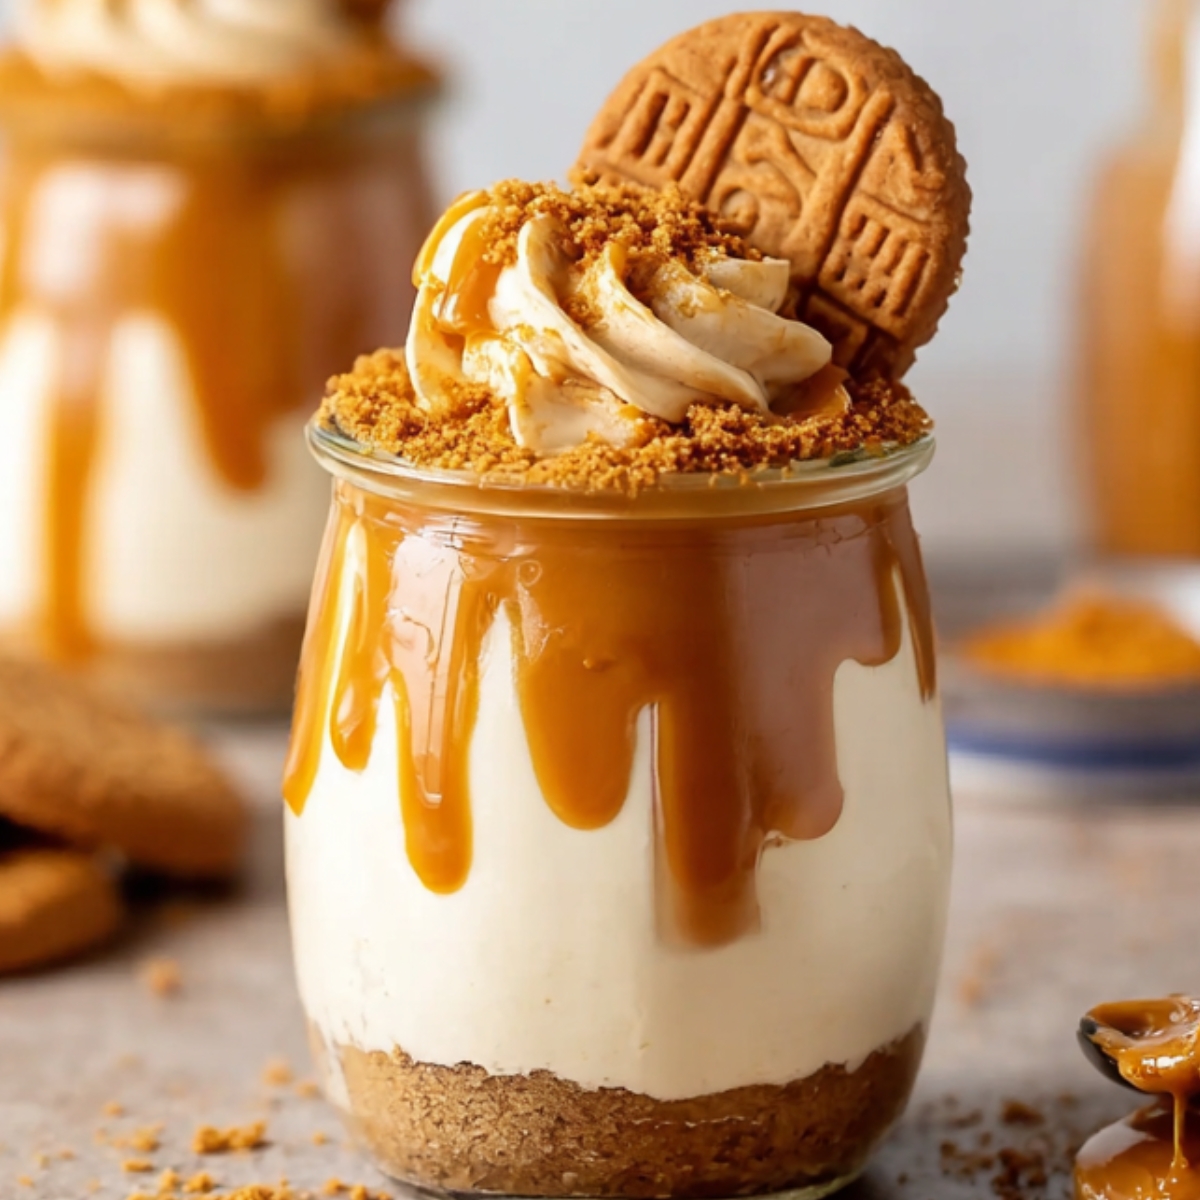
These creamy, no-bake Biscoff cheesecake cups layer smooth cookie butter cheesecake with melted Biscoff spread and a crunchy cookie topping. I first tried a version of this at my friend Sarah's holiday party, and I couldn't stop thinking about how that caramelized, spiced flavor paired so perfectly with tangy cream cheese. The best part? You don't need an oven, and everything comes together in about ten minutes of hands-on work.

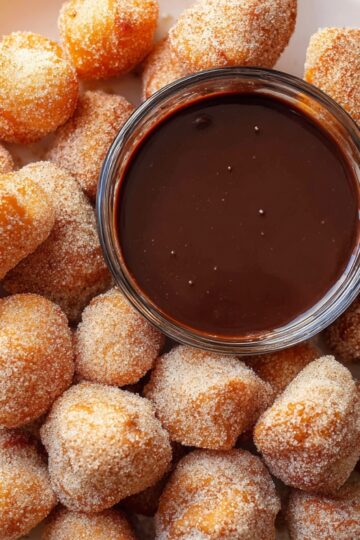
If you love easy, impressive desserts, you might also enjoy my Easy belgian waffle recipe for weekend mornings, or try these Easy Shortbread Cookies when you want something buttery and simple. For another no-bake treat, my Easy flan recipe mexican is always a crowd-pleaser.
Why You'll Love This Recipe
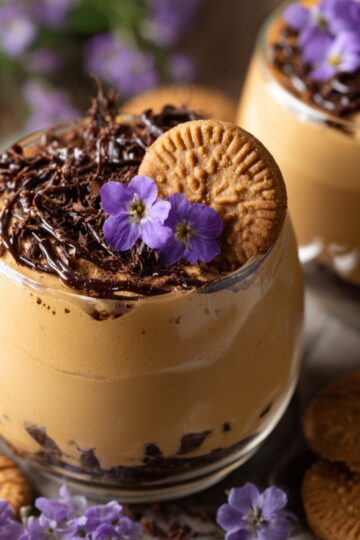
This no-bake Biscoff cheesecake is as easy as stirring a few ingredients and letting the fridge do the rest. The whipped cream keeps the filling light and airy, while the Biscoff spread adds that signature caramelized flavor. You get three distinct layers-melted cookie butter on the bottom, fluffy Biscoff cheesecake cups in the middle, and a glossy Biscoff topping with crushed cookies. It's rich without feeling heavy, and each jar is the perfect single serving.
Jump to:
Biscoff cheesecake cups Ingredients
Simple pantry staples and one special ingredient come together to make these cookie butter Biscoff cheesecake cups irresistible.
See Recipe Card Below This Post For Ingredient Quantities
For the Biscoff Base:
- Smooth Biscoff spread, melted: This forms the sweet, caramelized base layer. Melting it makes it easy to spoon and swirl into each jar.
For the Whipped Biscoff Cheesecake Filling:
- Heavy cream: Whipped to stiff peaks, this lightens the filling and gives it a mousse-like texture. Make sure it's at least 33% fat for the best results.
- Full-fat cream cheese, softened: Adds tang and richness. Softening it first helps everything blend smoothly without lumps.
- Smooth Biscoff spread: Blended into the cream cheese, this is what gives the filling its warm, spiced flavor.
For the Topping:
- Smooth Biscoff spread, melted: Drizzled over the cheesecake layer for an extra hit of cookie butter goodness.
- Biscoff cookies, crushed: Adds crunch and a pretty finish. You can crush them as fine or chunky as you like.
How to Make Biscoff Cheesecake Cups
This Biscoff dessert comes together in just a few simple steps, and most of the work is letting it chill.
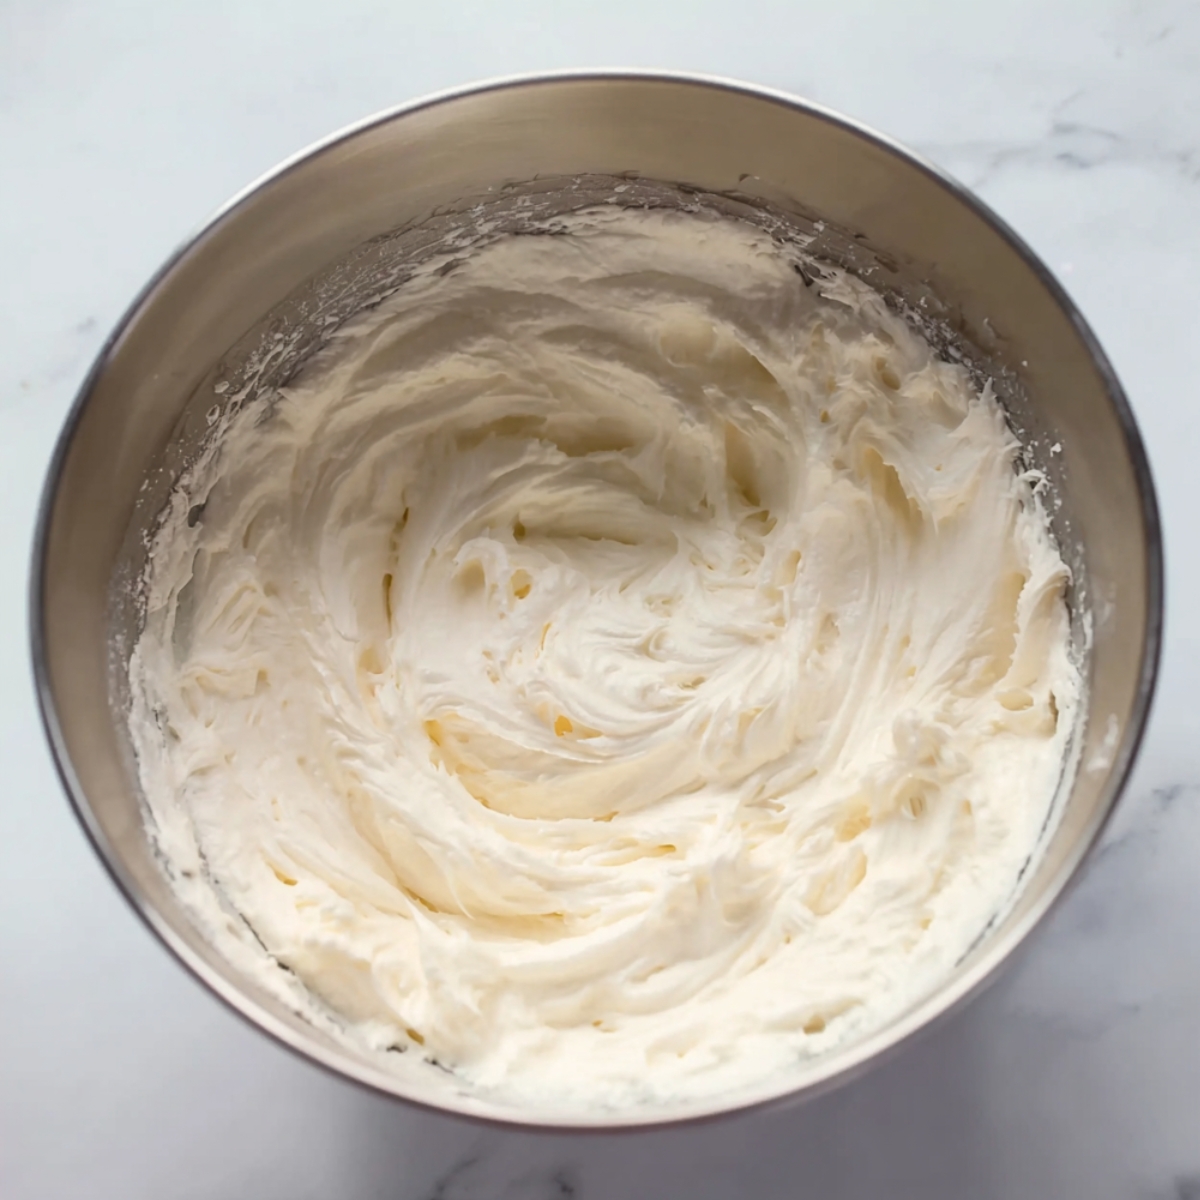
Whip the cream: Chill a metal bowl in the freezer for about 10 minutes, then remove it. Add the heavy cream and beat with a hand mixer, starting on low and increasing to medium-high, until stiff peaks form. This usually takes about 2 to 3 minutes. Set aside.
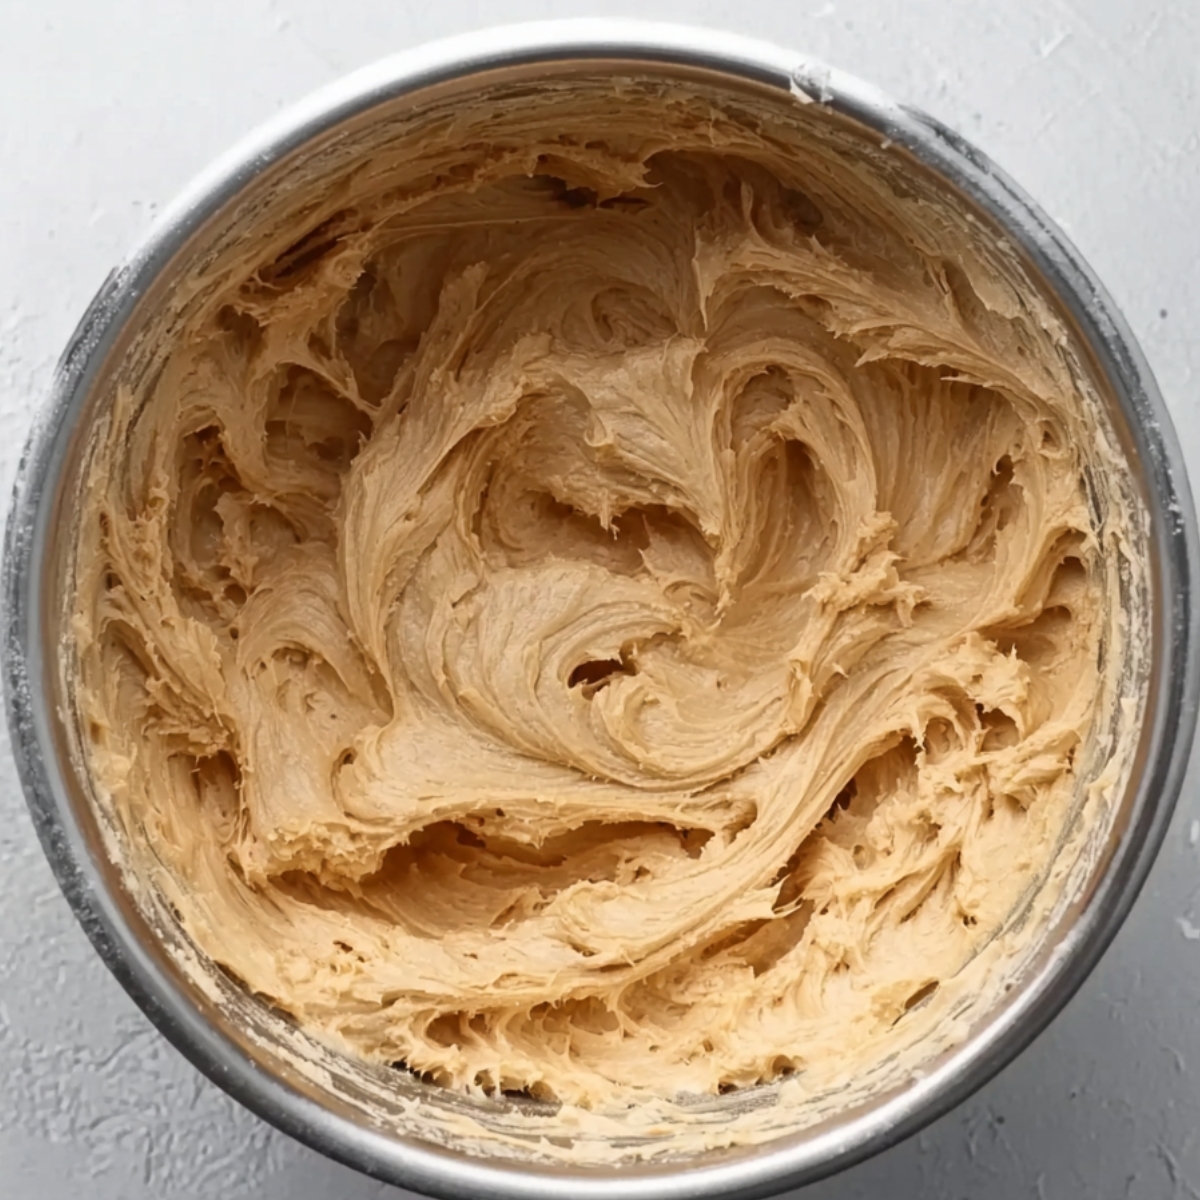
Mix the Biscoff and cream cheese: In another bowl, beat the softened cream cheese and 1⁄2 cup of Biscoff spread until smooth and creamy, about 1 to 2 minutes. Don't overmix, or the filling can become thin.
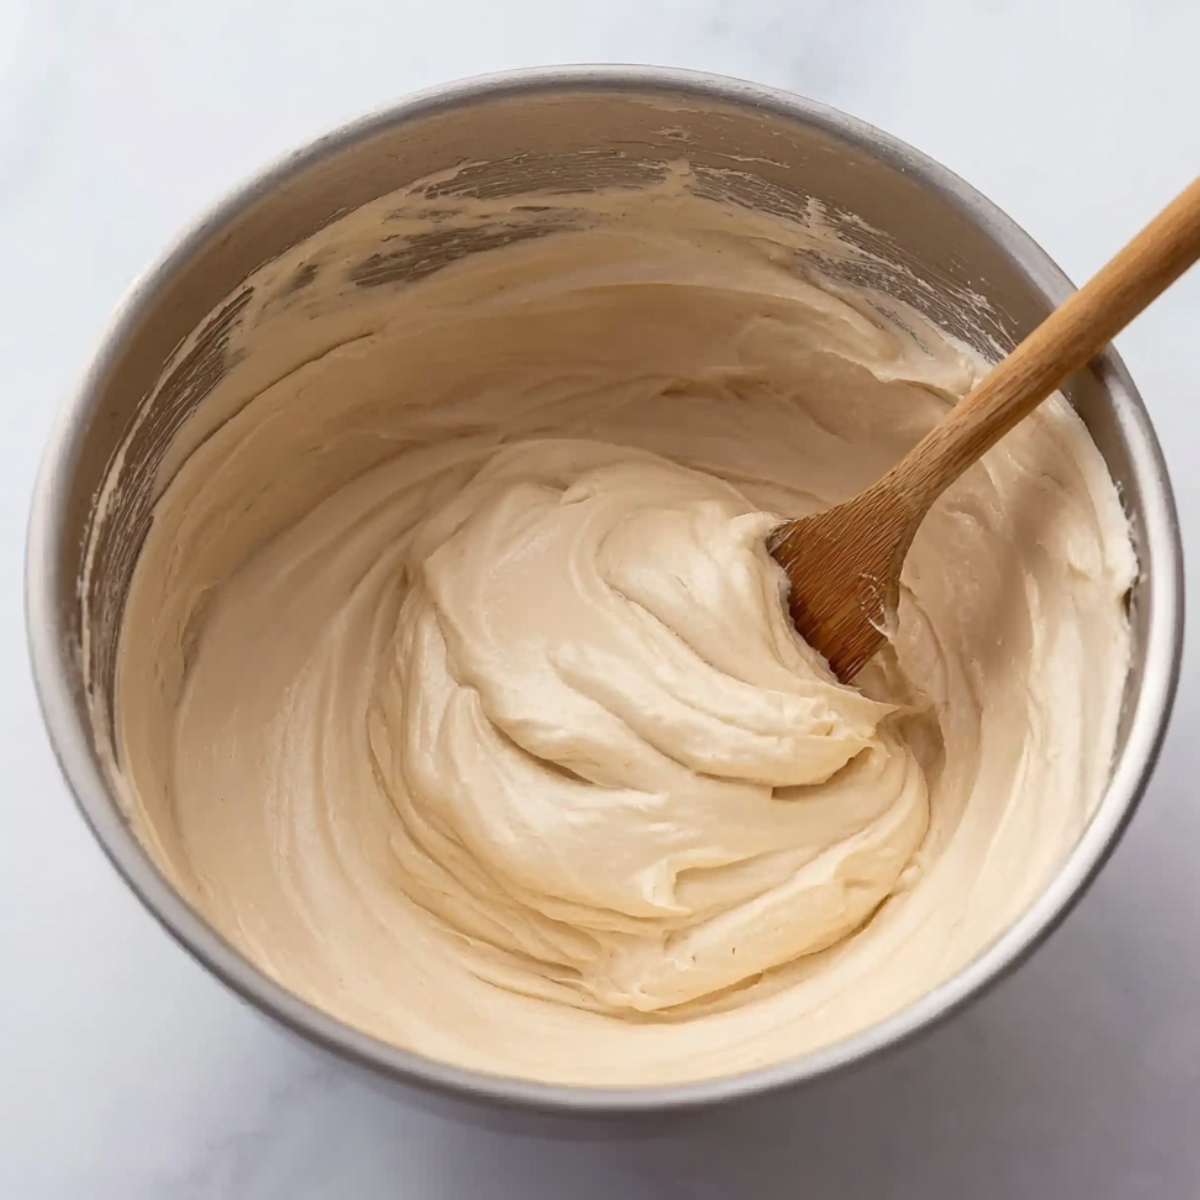
Fold in the whipped cream: Gently fold the whipped cream into the Biscoff mixture in two batches, using a spatula to keep everything light and airy. Pop the bowl in the fridge while you prepare the jars.
Melt the base layer: Melt 8 tablespoons of Biscoff spread in the microwave on low for about 10 to 15 seconds, or use a double boiler if you prefer. Stir until smooth.
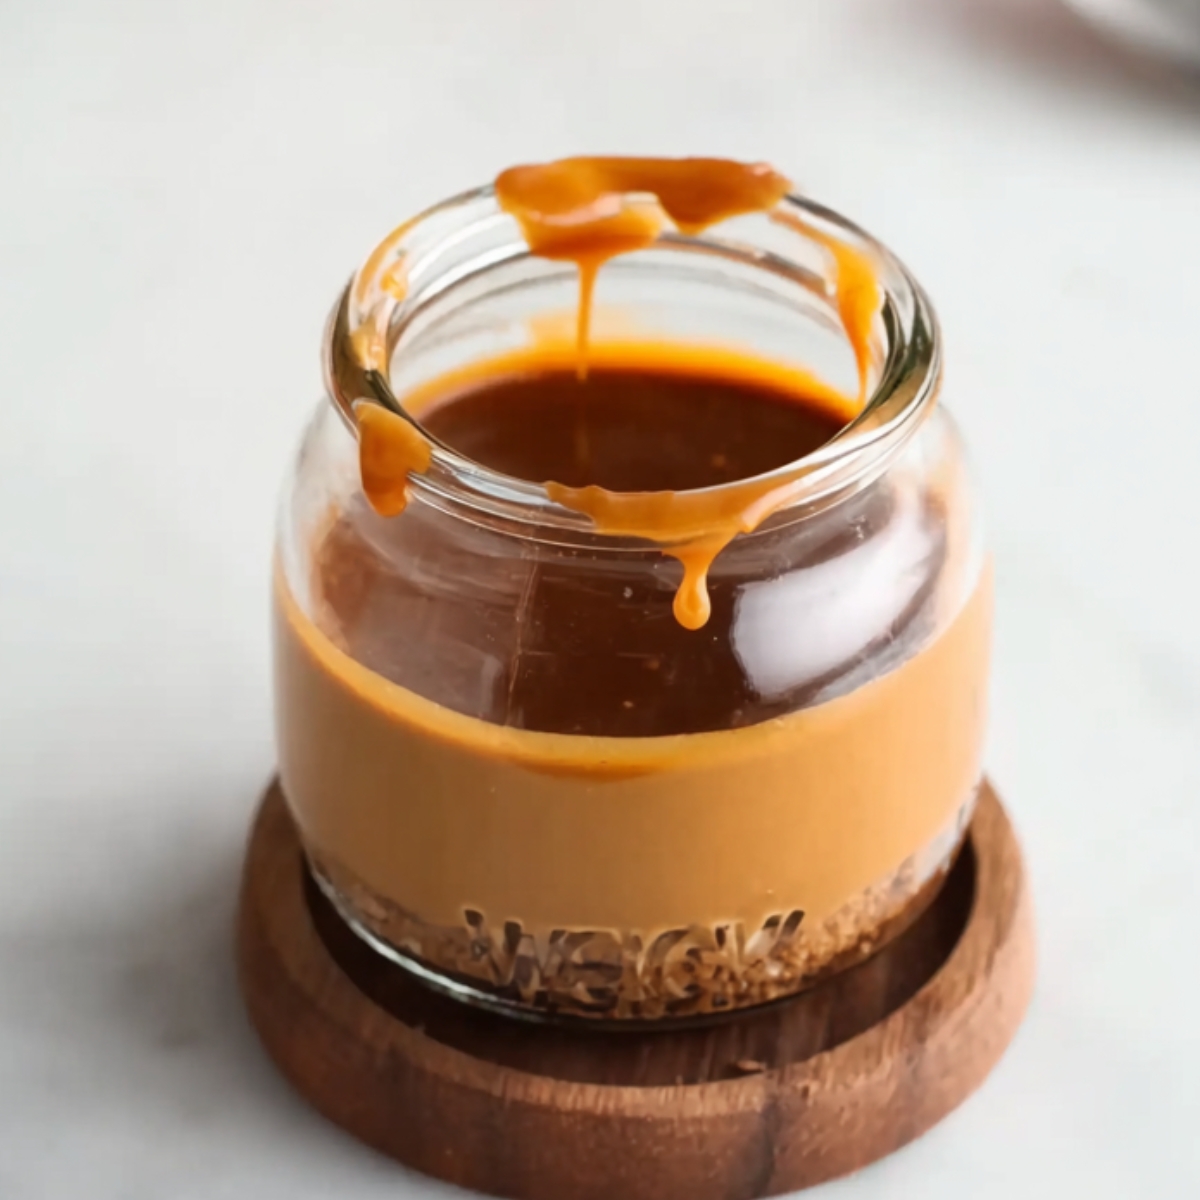
Assemble the base: Spoon 2 tablespoons of melted Biscoff spread into the bottom of each tulip jar. Swirl gently to coat the base, then let it set for a minute or two.
Add the cheesecake filling: Spoon or pipe the chilled cheesecake filling into each jar, filling to just below the rim. A piping bag makes this step easier, but a spoon works perfectly fine.
Top with more Biscoff: Melt another 8 to 12 tablespoons of Biscoff spread and spoon 2 to 3 tablespoons over the cheesecake layer in each jar. This creates a glossy, indulgent top layer.
Chill: Refrigerate the jars for about an hour to let everything set. The filling will firm up, and the layers will stay distinct when you dig in.
Finish with cookies: Just before serving, sprinkle each jar with a generous layer of crushed Biscoff cookies. The crunch against the creamy filling is what makes these cups so satisfying.
Optional drizzle: For extra flair, drizzle a little more melted Biscoff spread over the top. It's not required, but it's highly recommended if you want to really lean into the cookie butter flavor.
Substitutions and Variations
You can tweak this Biscoff cheesecake cups recipe to fit what you have on hand or your flavor preferences.
- Cookie butter alternatives: If you can't find Biscoff spread, try another speculoos or gingerbread cookie butter. The flavor will be similar.
- Whipped topping: Swap the heavy cream for stabilized whipped cream or even Cool Whip if you want something quicker. The texture will be a bit different, but still delicious.
- Cream cheese: Full-fat is best for richness, but you can use reduced-fat cream cheese if needed. Just know the filling might be slightly less creamy.
- Add-ins: Stir mini chocolate chips, toffee bits, or a pinch of cinnamon into the Biscoff cheesecake cups filling for a twist.
- Graham cracker base: If you want a traditional crust, press a thin layer of crushed graham crackers mixed with melted butter into the bottom of each jar before adding the Biscoff layer.
Equipment FOR Biscoff cheesecake cups
You don't need much to make these no-bake Biscoff cheesecake cups, and everything is basic kitchen gear.
- Metal bowl: Chilling it first helps the cream whip faster and hold its shape.
- Hand mixer or stand mixer: Makes whipping the cream and beating the cream cheese quick and easy.
- Tulip jars or small cups: 7.4 oz jars work perfectly, but you can use any small cups or ramekins you have.
- Spoon or piping bag: A piping bag gives you clean layers, but a spoon is just as effective.
- Microwave or double boiler: For melting the Biscoff spread without burning it.
Storage Tips
These Lotus Biscoff cheesecake cups keep well in the fridge, so you can make them ahead.
- Refrigerator: Store covered in the fridge for up to 4 days. The crushed cookies on top might soften slightly over time, so you can add them fresh right before serving if you prefer extra crunch.
- Freezer: You can freeze these for up to 2 months. Thaw in the fridge overnight before serving. The texture might be slightly softer after freezing, but they'll still taste great.
- Make-ahead: Assemble the cups up to the chilling step, then cover and refrigerate. Add the crushed cookies just before serving to keep them crispy.
Expert Tips
A few small tricks make these easy Biscoff cheesecake cups desserts turn out beautifully every time.
Use a piping bag: Snip the corner of a zip-top bag if you don't have a piping bag. It gives you more control and keeps the layers neat.
Soften the cream cheese: Leave it at room temperature for about 30 minutes before mixing. Cold cream cheese doesn't blend smoothly and can leave lumps.
Don't overwhip the cream: Stop as soon as stiff peaks form. Overwhipping can make the cream grainy or even turn it into butter.
Fold gently: When you're combining the whipped cream and Biscoff mixture, use slow, gentle strokes. Stirring too hard deflates the air and makes the filling dense.
Warm the Biscoff spread slightly: If your Biscoff is too thick to drizzle, warm it in the microwave for just a few seconds. It should be pourable but not hot.
Chill the jars: If you have time, pop the empty jars in the fridge for 10 minutes before assembling. It helps the Biscoff base set faster.
A Little Story About These Biscoff cheesecake cups
My neighbor Sarah stopped by one afternoon while I was testing this recipe, and Lily immediately dragged her into the kitchen. "You have to taste this," Lily said, handing her a spoon before I could even explain what I was making. Sarah took one bite and her eyes went wide. "Wait, is this Biscoff? Like, the cookies?" she asked. I nodded, and she scooped another spoonful straight from the bowl. "You're going to have to teach me how to make this," she said, already eyeing the jars I'd filled. I laughed and told her it was almost too easy to share, but she insisted.
FAQ
How long does a Biscoff cheesecake cups take to set?
About an hour in the fridge is usually enough for the filling to firm up and the layers to hold their shape. If you're in a rush, 30 minutes will work in a pinch, but the texture is better with a full hour. My mom always says patience is half the recipe when it comes to no-bake desserts.
How do you know when Biscoff cheesecake cups are done?
Since these are no-bake, there's no baking time to worry about. They're done when the filling feels firm to the touch and doesn't jiggle when you gently shake the jar. If it's still soft and loose, give it more time in the fridge.
How long can I keep Biscoff cheesecake cups in the fridge?
These cups stay fresh for up to 4 days when covered and refrigerated. The flavor actually gets better after a day or two as everything melds together. Just add the crushed cookies right before serving if you want them extra crunchy.
Does Biscoff cheesecake cups need to be refrigerated?
The spread itself doesn't need to be refrigerated, but once you've made these cheesecake cups, they absolutely do. The cream cheese and whipped cream in the filling require cold storage to stay safe and maintain their texture. Always keep finished desserts in the fridge.
Related
Looking for other recipes like this? Try these:


Pairing
These are my favorite dishes to serve with Biscoff cheesecake cups:


No-Bake Biscoff Cheesecake Cups
Ingredients
Method
- Place a metal bowl in the freezer for about 10 minutes. Once chilled, add the heavy cream and whip using a hand mixer, starting on low speed and gradually increasing to medium-high until stiff peaks form. Set aside.
- In another bowl, beat the softened cream cheese and ½ cup of Biscoff spread until smooth and creamy, being careful not to overmix.
- Fold the whipped cream into the Biscoff mixture in two batches, ensuring everything is combined evenly. Chill the mixture while you prepare the base.
- Melt 8 tablespoons of Biscoff spread in the microwave or using a double boiler, then pour 2 tablespoons of this melted spread into the bottom of each jar or cup, swirling gently to coat the base.
- Carefully spoon or pipe the cheesecake filling into each jar, filling to just below the rim.
- Melt another 8-12 tablespoons of Biscoff spread and drizzle 2-3 tablespoons over the cheesecake layer in each jar.
- Refrigerate the jars for about an hour to allow the layers to set.
- Before serving, generously sprinkle each jar with crushed Biscoff cookies.
- Optional: Drizzle with extra melted Biscoff spread for an extra indulgent touch.
Leave a Reply